WooCommerce Plugin
Install the LionWheel Shipping plugin in your WooCommerce store, then send orders to LionWheel and print their labels.
Updated
On this page
The LionWheel Shipping plugin sends your WooCommerce orders to LionWheel as deliveries and prints their labels, right from the orders screen in WordPress.
What you need:
- A WordPress site with WooCommerce.
- A LionWheel API token (step 1).
- A WordPress user who can manage orders (Administrator or Shop manager).
The plugin’s screens are in English.
Step 1: Get an API token
- If a courier delivers for you, ask them for your company API token. It starts with
c_key_. - If you run your own deliveries in LionWheel, use the token from your API subscription: in LionWheel, go to the Integrations page and click API subscription on the API card.
Tokens that start with lw_ don’t work with the plugin yet.
Step 2: Install the plugin
- Download the plugin: lionwheel-shipping.zip. Keep it as a zip file; don’t unzip it.
- In WordPress, go to Plugins => Add New Plugin and click Upload Plugin.
- Click Choose File, select the zip file and click Install Now.
- When the installation finishes, click Activate Plugin.
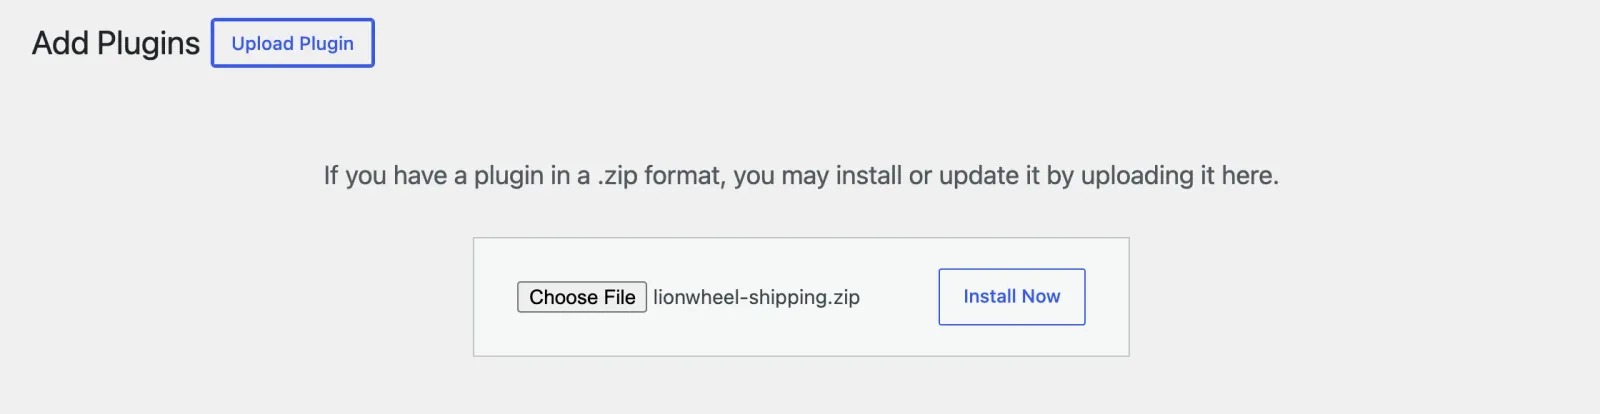
Updating from an older version: upload the new zip the same way and click Replace current with uploaded. Your settings and the shipment IDs on your orders stay.
Step 3: Enter the API token
- In WordPress, go to WooCommerce => LionWheel Settings.
- Paste your token in API Token.
- In Labels Per Page, choose how many labels to print on each page (1, 4 or 8) when you print several orders at once.
- Click Save Changes.
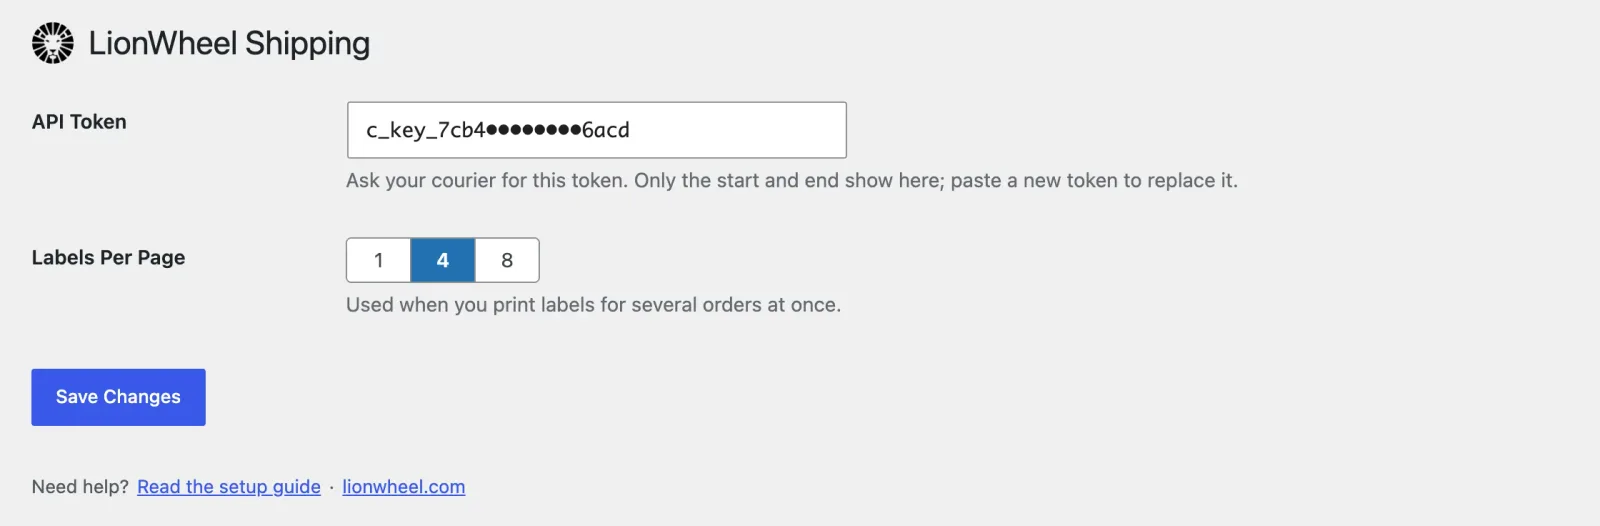
Once saved, only the start and end of the token are shown, so you and LionWheel support can still tell which token it is. To replace it, delete it from the field, paste the new one and save.
Send a single order
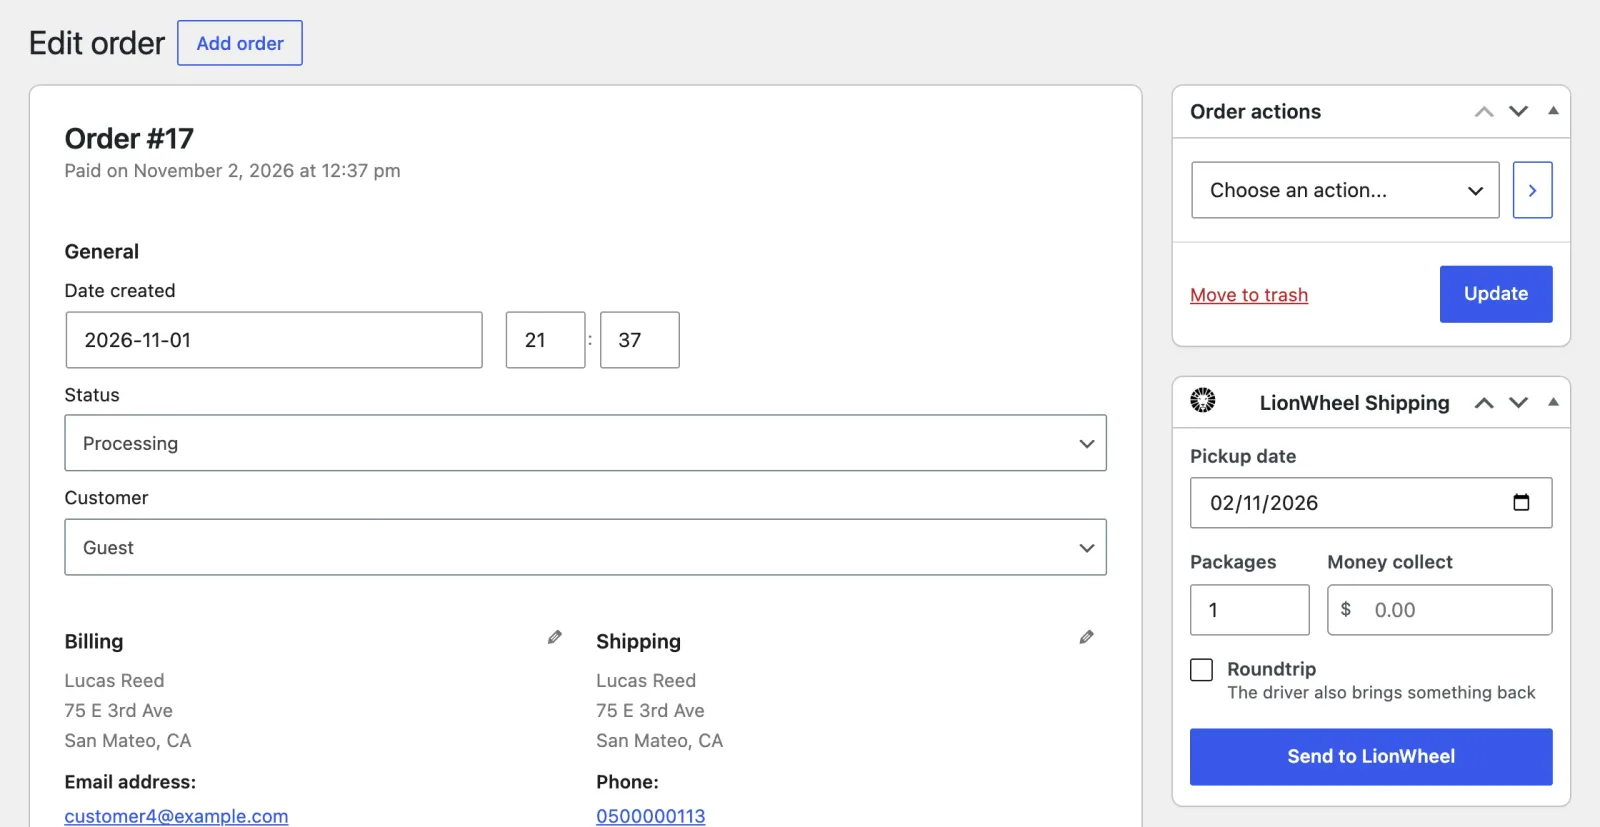
- Open the order. The LionWheel Shipping box is in the right column.
- Fill in the delivery details:
- Pickup date: today, unless you choose another day.
- Packages: the number of packages, 1 by default.
- Money collect: an amount for the driver to collect from the customer, in your store’s currency. Leave it empty if there’s nothing to collect.
- Roundtrip: check it if the driver also brings something back.
- Click Send to LionWheel.
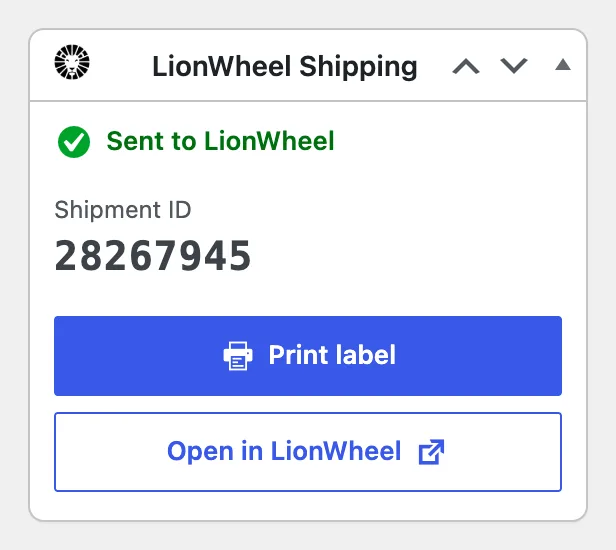
The box then shows the shipment ID, with Print label to print the delivery’s label and Open in LionWheel to open the delivery in LionWheel.
Send several orders at once
- Go to WooCommerce => Orders and check the orders you want to send.
- Click Send to LionWheel above the list.
- Fill in the delivery details. They’re used for every selected order.
- Click the send button (for example, Send 3 orders).
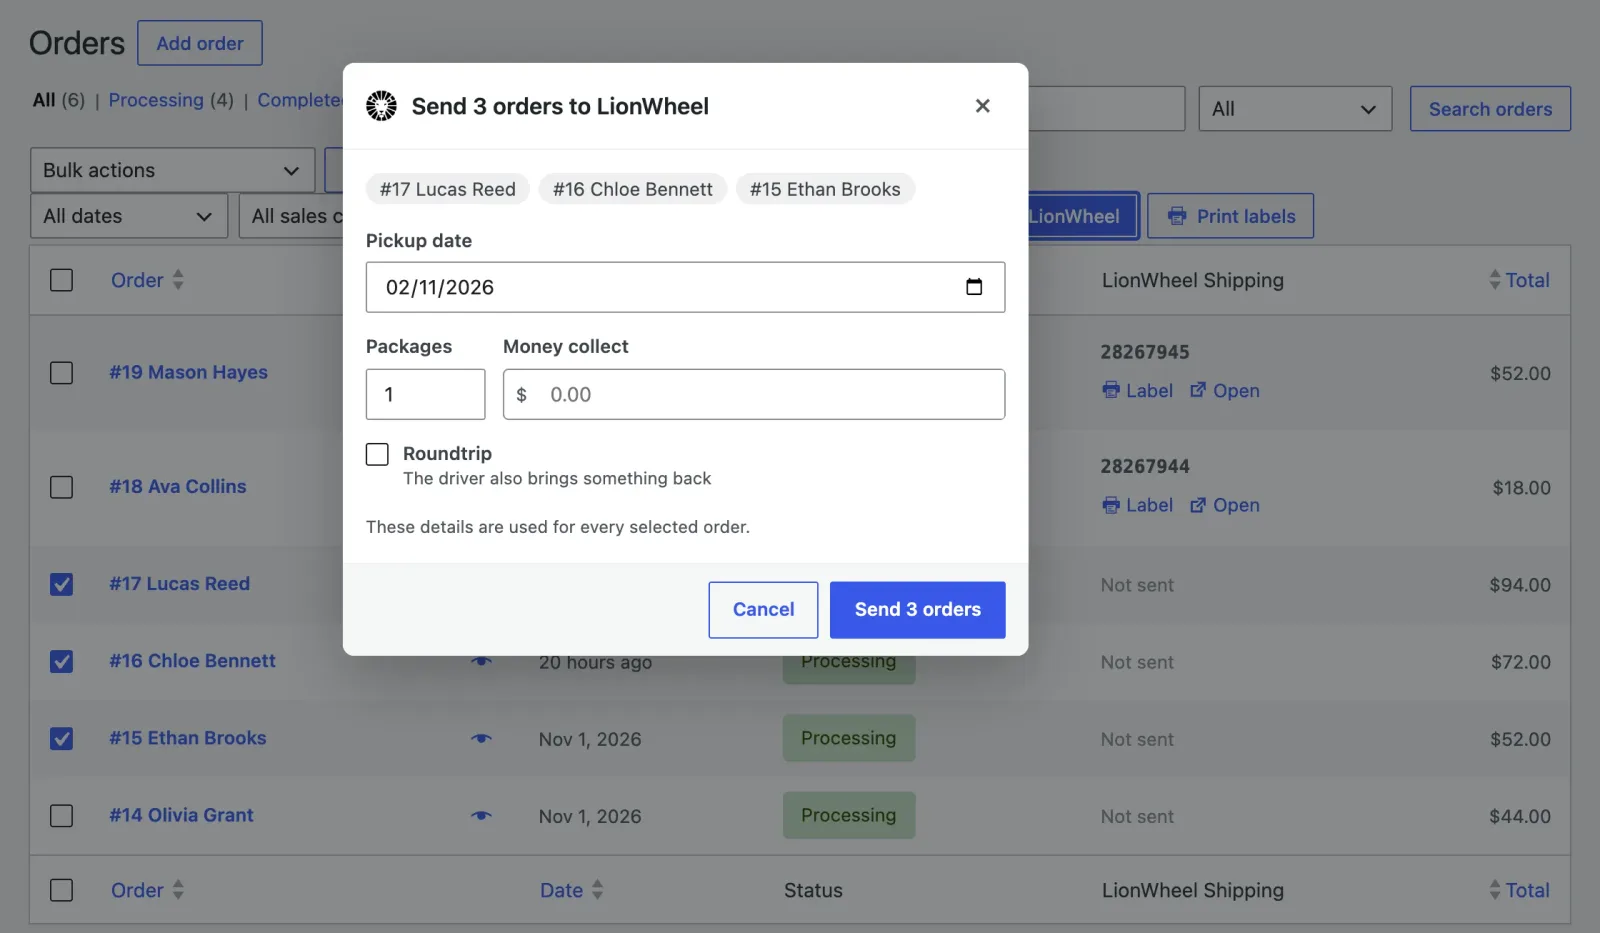
The orders are sent one after the other. If one can’t be sent, sending stops at that order and tells you why. When it’s done, click Done.
Print labels
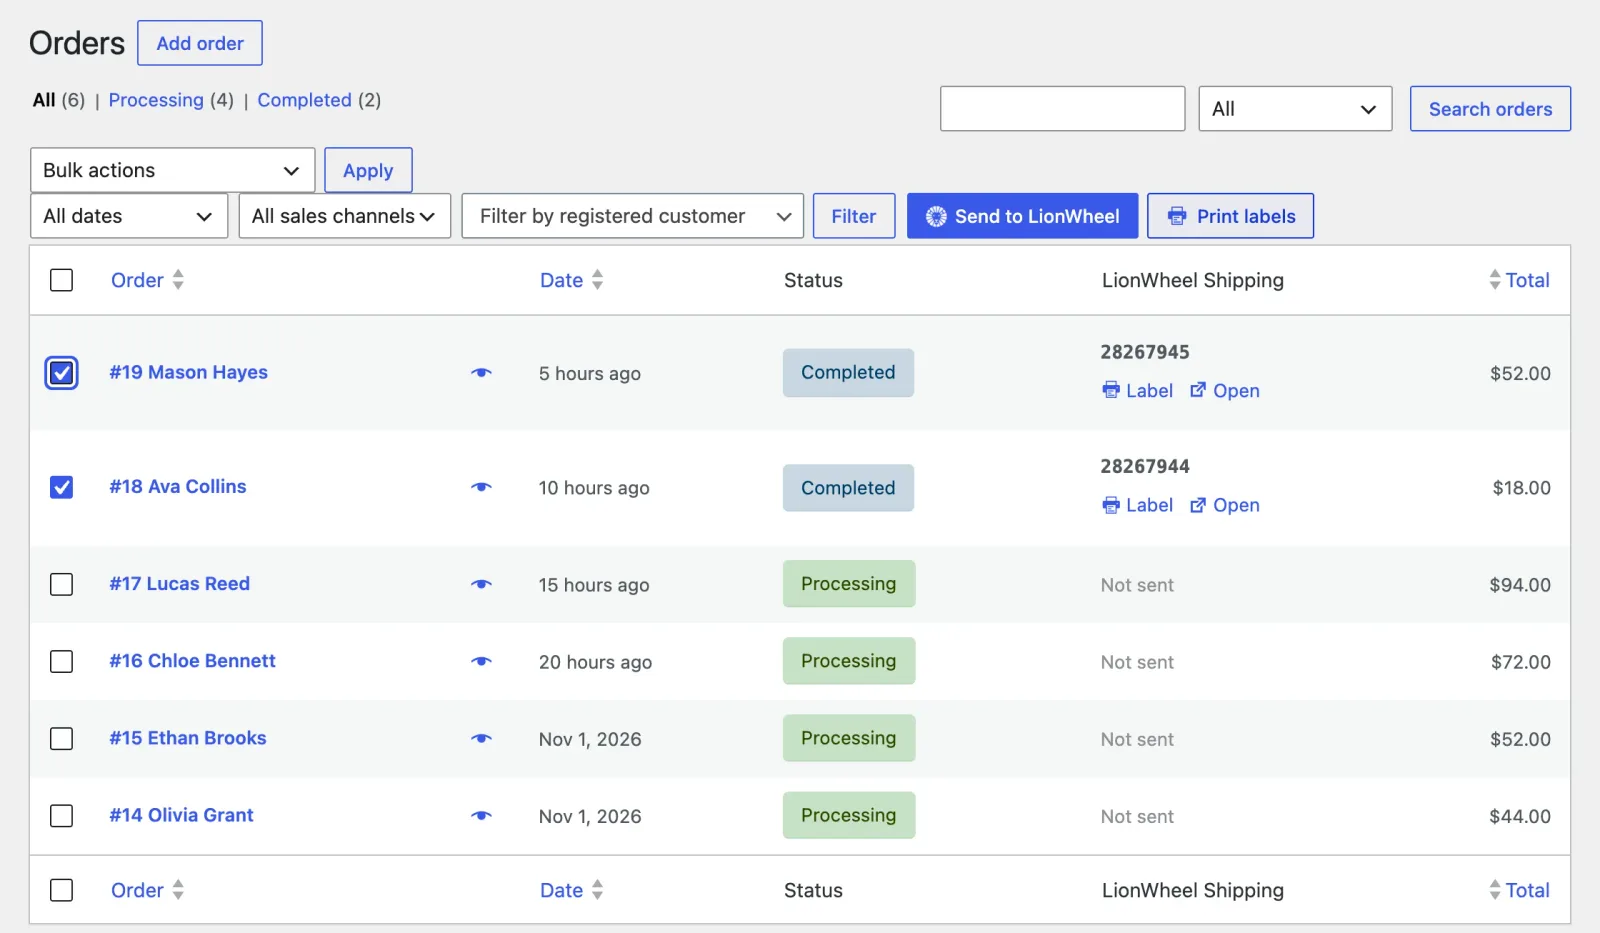
The orders list has a LionWheel Shipping column. For an order that was sent, it shows the shipment ID with a Label link and an Open link (to the delivery in LionWheel). Otherwise it shows Not sent.
To print the labels of several orders, check orders that were already sent and click Print labels. All the labels open in one PDF, with as many labels on each page as you chose in the settings.
What is sent to LionWheel
For each order, the plugin sends:
- The shipping address, or the billing address if the order has no shipping address.
- The customer’s name, phone and email, and the customer’s note.
- The payment method and the order total.
- Each product’s name, quantity, price, SKU and image.
The pickup date, packages, money to collect and roundtrip come from what you filled in when you sent the order.
If an order can’t be sent
A message shows the reason from LionWheel, for example a wrong API token or a missing city. Fix the order or the token and send it again. If the message isn’t clear, email it to support@lionwheel.com.