- 1. Introduction
- 2. Creating Deliveries
- 3. LionWheel Delivery Management Guide
- 4. Plan Drivers Routes
- 5. Import an Excel file to LionWheel
- 6. Status Descriptions
- 7. Settings
- 8. Edit Geolocation
- 9. Flexible import: import from any Excel layout
- 10. Logging in and resetting a password
Plan Drivers Routes
This guide will walk you through the process of creating drivers' routes
Updated
On this page
Before planning the route, ensure all desired deliveries are assigned to the relevant drivers and dates through the deliveries screen!
To access route planning, open the Drivers Routes page => select a driver and click on the driver’s name, then choose the desired date where the deliveries you want to plan are located.
Define Route’s Parameters
Set default values for the route’s parameters through Settings => General => Routing.
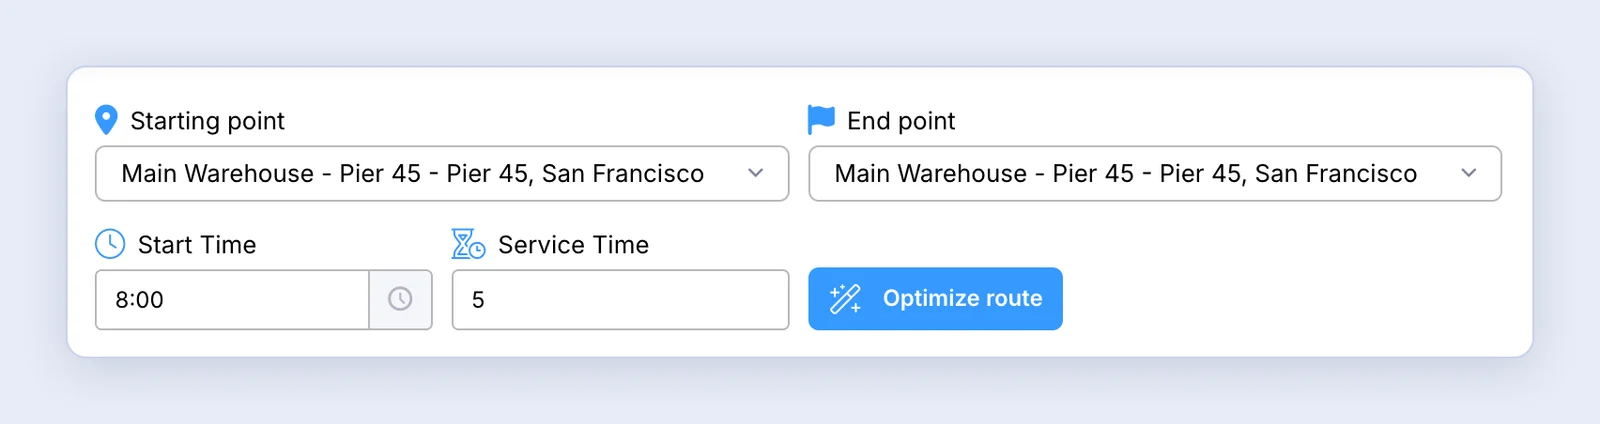
Start and End points
The system will display all saved locations and all addresses of the delivery points in the specific route. If the desired address doesn’t appear, you can add it through Settings => Locations.
Start time and Service time (For unloading, for example)
To set a different service time to a delivery, enter the delivery edit mode and define the desired time in minutes.
Optimize Route
After defining all the above parameters, click on the “Optimize route” button, and the system will display the most optimal route. You can also view the route on the map on the right side.
Once the optimization is successfully completed, an “ETA” (Estimated Arrival Time) will be added to all deliveries in the table.
Manual Route Planning
To adjust the route manually, you can drag the deliveries up and down the list (next to the delivery ID, there’s a 6-dot icon – long press and drag). When finished, click on “Save Route” and not on “Re-optimize route”.
To prioritize certain deliveries, select the delivery/ies you want to prioritize, then click on More in the bottom bar and choose VIP (relevant only for those without a pickup task).
Deliveries Table
In the table, we will see the status of all deliveries in the route.
Note: Deliveries listed under the “Not in Route” tab are not included in the route because you have not yet clicked “Optimize route” or “Save Route”.
Additionally, you can choose which columns to display in the table (the column order cannot be changed on this page).
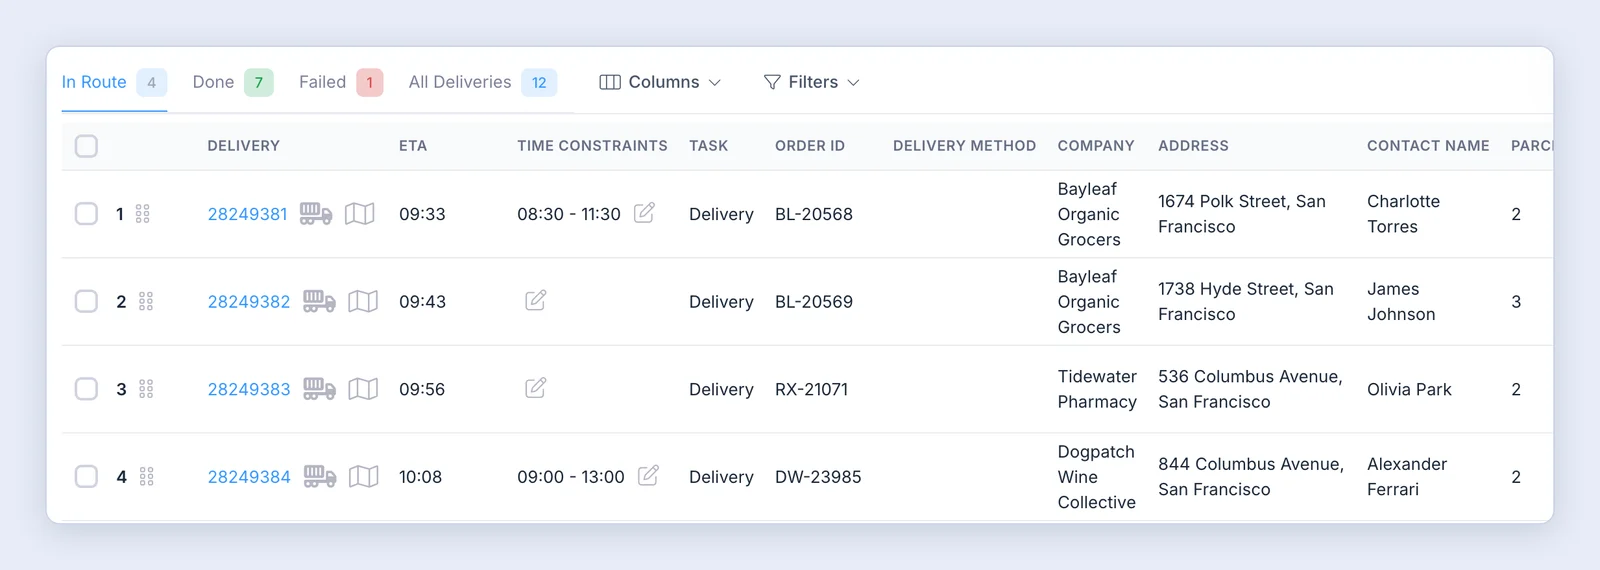
Addresses marked in red - the address could not be found and must be fixed before the route can be planned.
Addresses marked in yellow - addresses that the system couldn’t identify precisely, and likely contain an error. In this case - it’s recommended to enter the delivery and check the validity of the address, see how it’s displayed on the map and understand if it needs to be corrected.
Map
After the route is successfully optimized, all the points in the route will be numbered on the map. Additionally, the driver’s location will be marked with a green dot on the map; clicking on it will display the time when their location was last updated.
Markers on the map with an asterisk (*) next to the point number indicate multiple points. Clicking on the marker will show all the deliveries associated with that stop.
More Options

Print:
Easily print labels/ waybills for all points, and the driver’s route plan table.
Messages:
If you have purchased the SMS package, you will be able to send the SMS for the route from the driver route plan (view guide). The button is shown only when SMS sending is turned on for your account.
More:
By clicking this button, you can view the changes log of the route planning, view the route timeline (after the route is optimized), send a push notification to the driver, transfer the entire route to another driver, display the picking list for the route (for more information about the “Picking” feature, see the picking guide or contact us at support@lionwheel.com), and save or load a fixed route.
Save Route:
Use this button when planning the route manually.
Fixed Routes:
Use More => “Save As Template” to save the current route as a pattern for future use (fixed routes guide), and More => “Load a Recurring Route” to load a saved route.
Connect:
Use this button to connect to the driver’s app using the QR scanner (QR login guide).
Tips for accurate routes
- When entering a city without a specific address, the system will place the delivery marker at a random point within the city’s municipal boundaries.
- When using a saved location as the route’s start or end point, it’s crucial to ensure that the location has a complete address, including city, street, and number. Incomplete address details will prevent the system from generating a route. To verify or update saved locations, use Settings => Locations.
- Remember, accurate and complete address information is essential for proper route planning and overall system functionality.