- 1. Introduction
- 2. Creating Deliveries
- 3. LionWheel Delivery Management Guide
- 4. Plan Drivers Routes
- 5. Import deliveries from Excel
- 6. Status Descriptions
- 7. Settings
- 8. Edit Geolocation
- 9. Logging in and resetting a password
Import deliveries from Excel
Create many deliveries at once from an Excel or CSV file: with the flexible import, in any layout, or with the LionWheel template.
Updated
On this page
On the Import Deliveries page you can create many deliveries at once from a file. There are two ways to import:
- Flexible import: upload an Excel or CSV file as it is, in any layout. LionWheel suggests which column belongs to which field and shows a preview before the deliveries are created. This is the easiest way for most files, such as an export from your store or a file from a customer.
- Import with the template: download the LionWheel template, copy your deliveries into it and upload it.
Both end up in the same place: the deliveries are created, and every import appears in Import History.
Flexible import

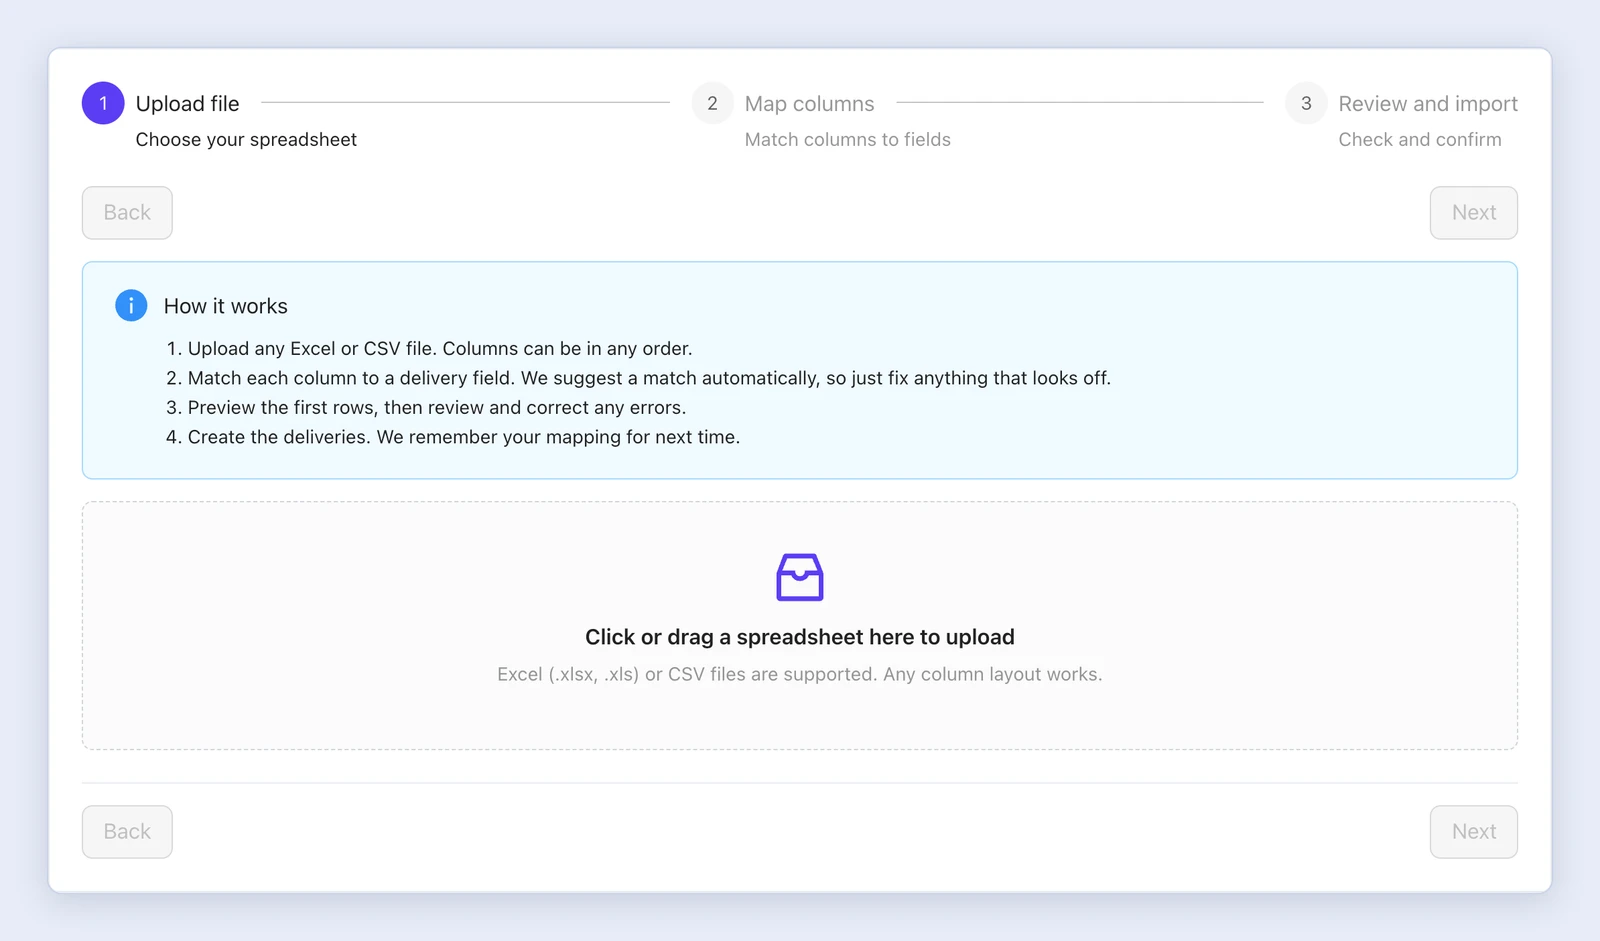
On the Import Deliveries page, click Try it now on the Flexible Excel import banner at the top of the page. The import has three steps: Upload file, Map columns and Review and import. To go back to the import with the template, click Classic import.
Note: The flexible import is currently marked Beta.
Step 1: Upload file
Drag the file into the upload area, or click it to choose a file. You can upload an Excel file (.xlsx or .xls) or a CSV file, with the columns in any order. Click Next.
Step 2: Map columns
LionWheel reads the file and suggests a delivery field in Map to field for each Spreadsheet column. Each suggestion shows how it was found: Matched by header, Similar header or Guessed from content.
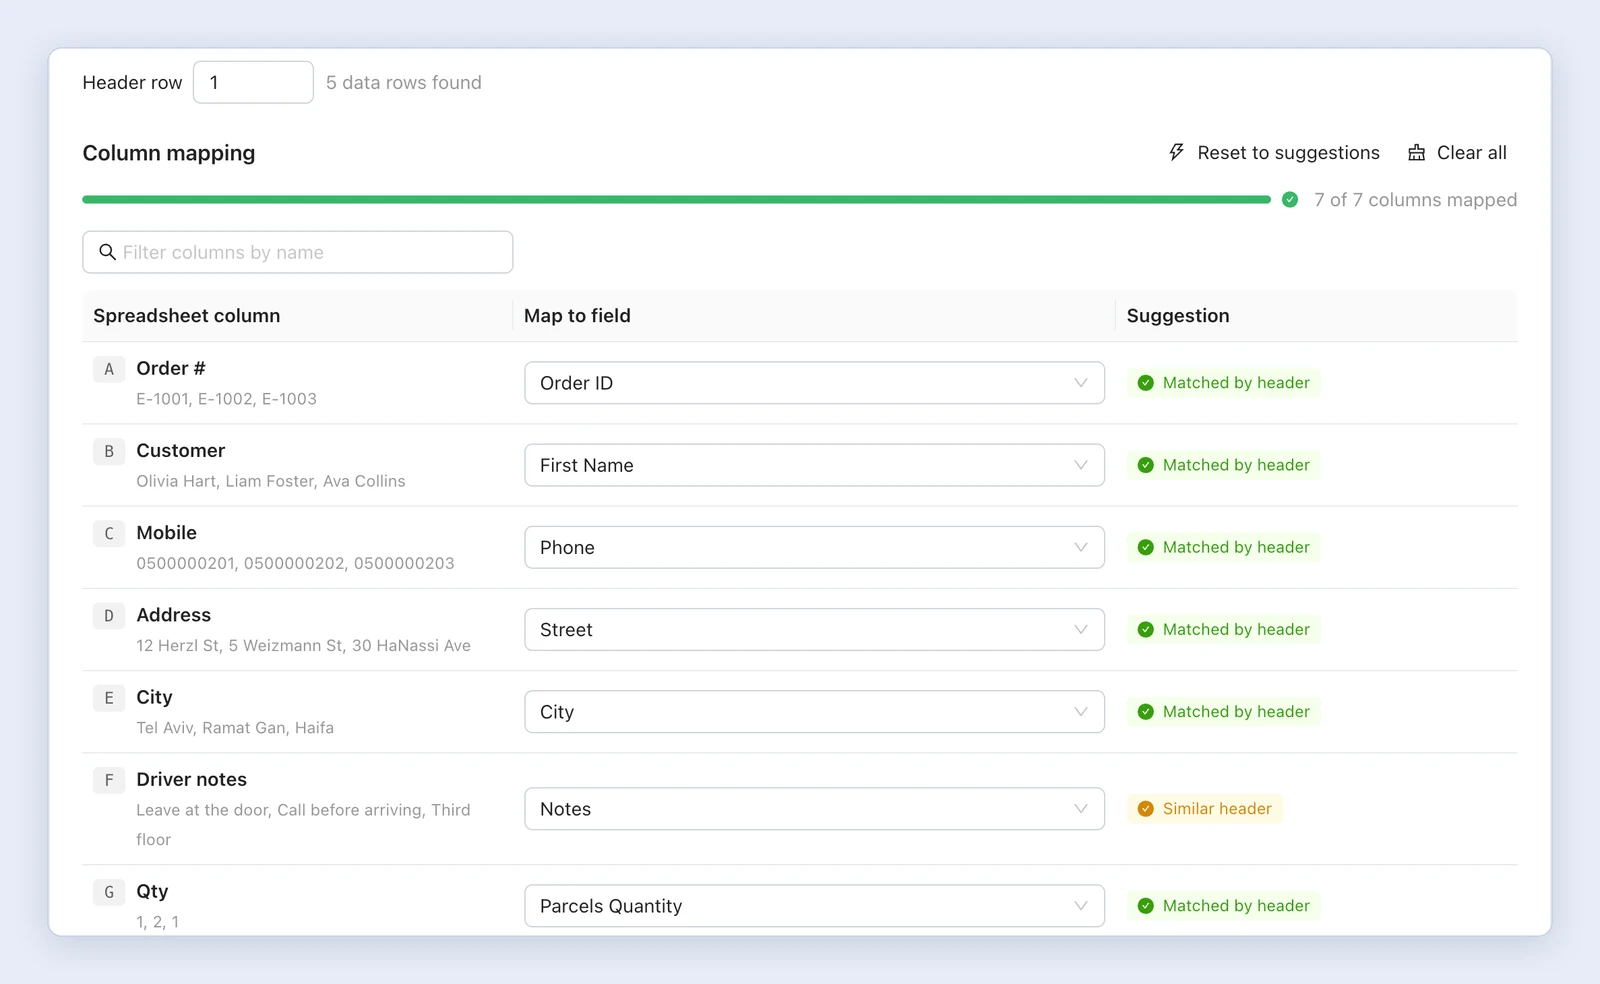
- In Header row, check that the number is the row holding your file’s column titles, and change it if needed.
- Go over the suggestions and change the field where needed. Leave a column you don’t need on Do not import. The list of fields also includes your account’s custom fields, if you have any.
- Preview shows the first rows as they will be imported. Check that the data landed in the right fields.
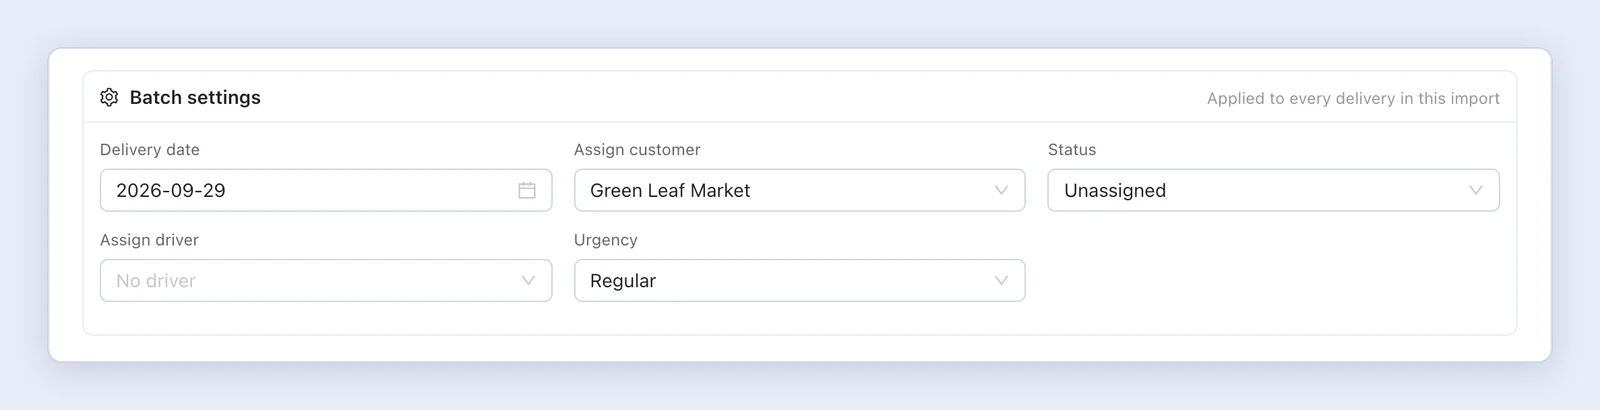
- In Batch settings, choose what applies to every delivery in the file: Delivery date and Status, and depending on your account, Assign customer, Assign driver, Urgency, Vehicle kind and Round trip.
- Click Continue to review.
To start over, click Reset to suggestions (back to LionWheel’s suggestions) or Clear all. In a file with many columns, find a column with Filter columns by name.
Your mapping is saved: after the deliveries are created, LionWheel saves the mapping. The next time you import a file with the same headers, even in a different column order, the mapping is pre-filled and you see “We pre-filled the mapping from your last import of this file layout.”
Step 3: Review and import
The top of the screen shows Total rows, Valid and With errors. If your account has required fields, they’re listed below. In the table, a field with an error is marked.
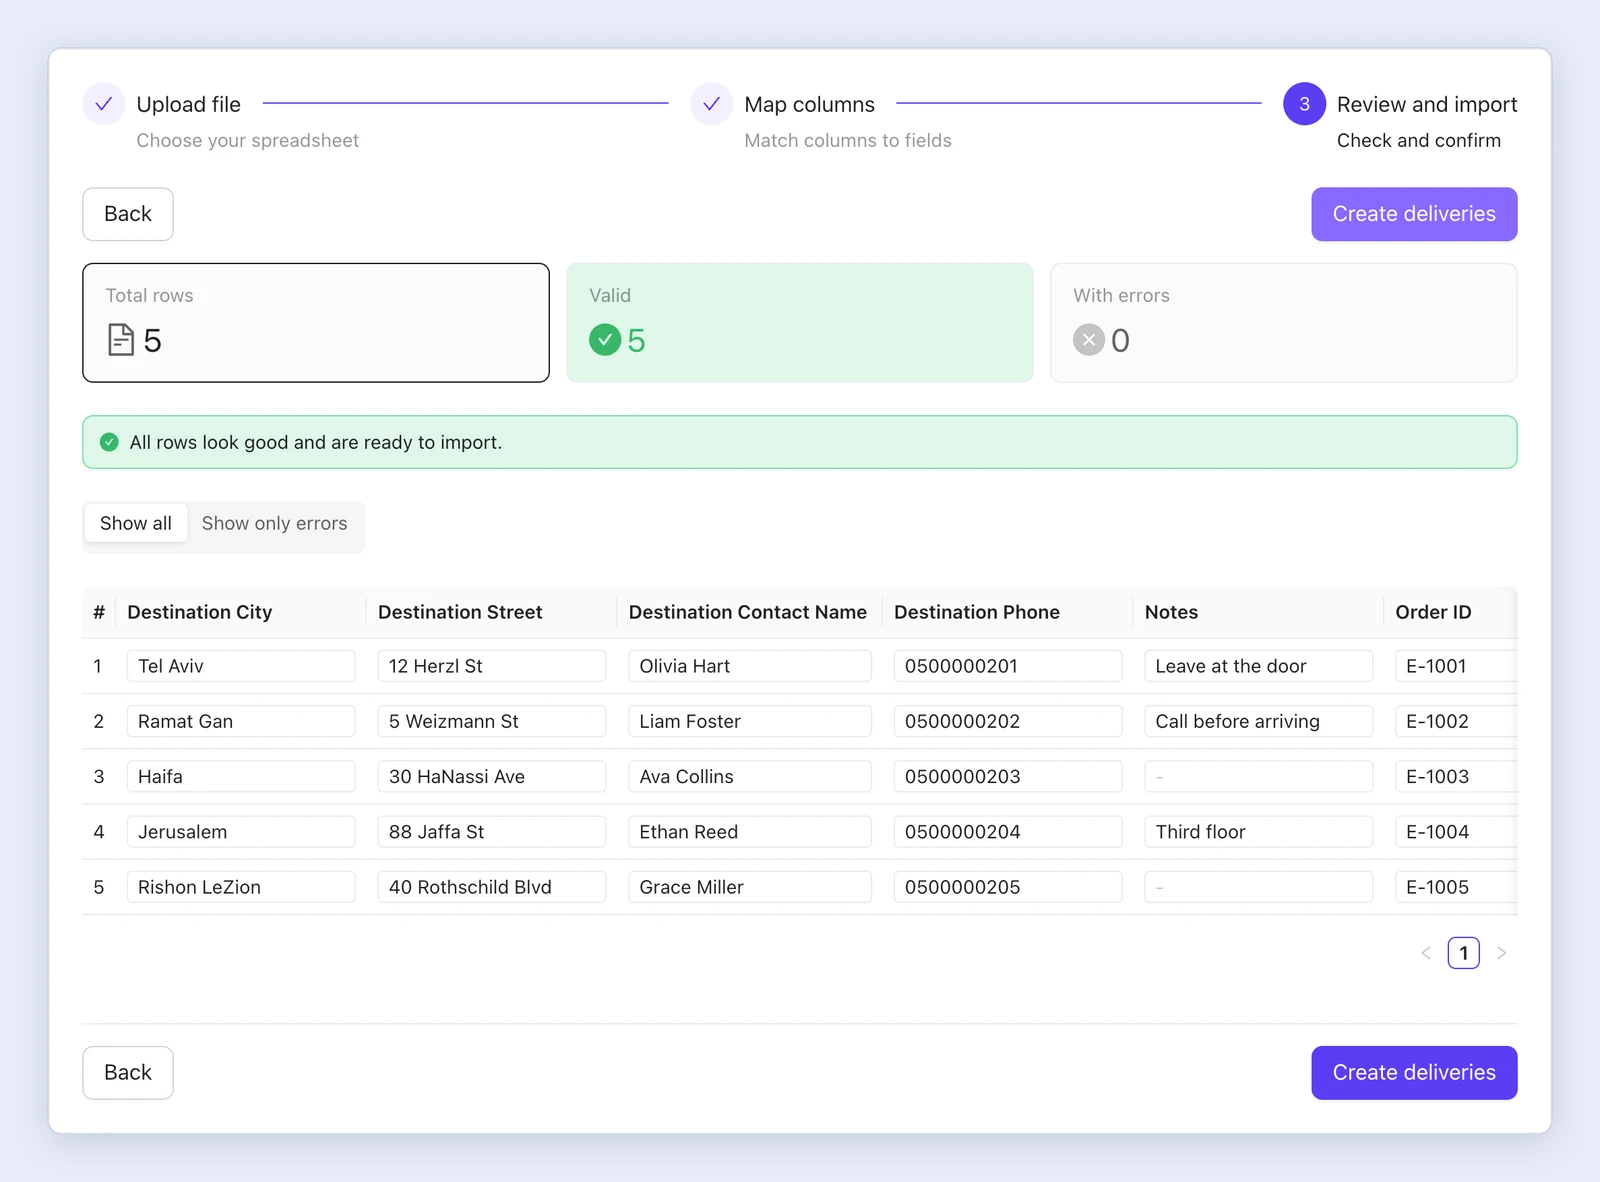
- Fix a value right in the table, and the row is checked again.
- Delete removes a row you don’t want to import.
- Show only errors shows just the rows that need fixing.
When everything is ready, click Create deliveries. If some rows still have errors, a window offers two options: Create valid only, or Don’t create to go back and fix them. While rows have errors, you can’t create all of them.
The deliveries are created in the background, and you return to the import page with a message saying how many deliveries are being imported.
Import with the template
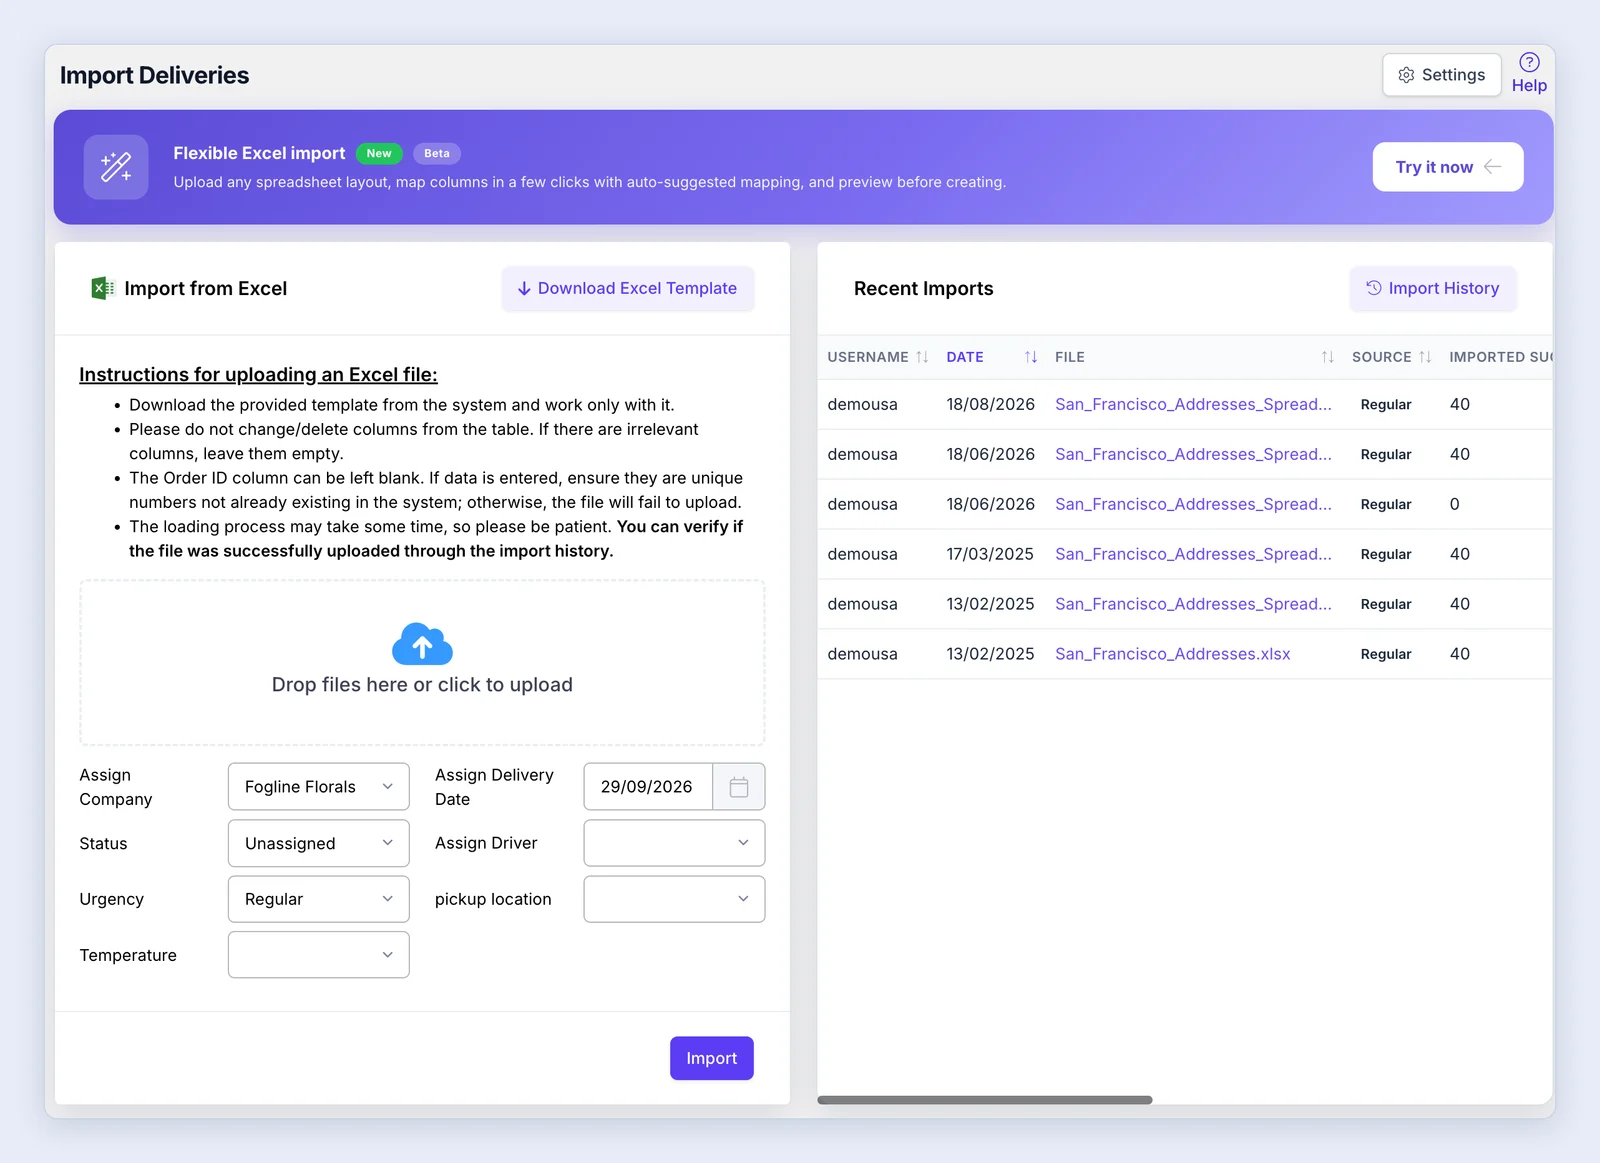
On the Import Deliveries page, download the template, fill in the deliveries’ details and upload it. LionWheel creates the deliveries accordingly.
Preparing the file
- Download and use only the template provided in the system.
- Don’t change or delete the template’s columns. If you have no data for a column, leave it empty. Have a file in a different layout? Use the flexible import instead.
- The destination city is mandatory; otherwise, the delivery won’t be imported.
- When uploading a file with a large number of deliveries, wait a few minutes for it to finish before uploading another file.
- Don’t have Excel on your computer? Use Google Sheets: it’s free and can save files as Excel (.xlsx) when you’re done.
Import preview
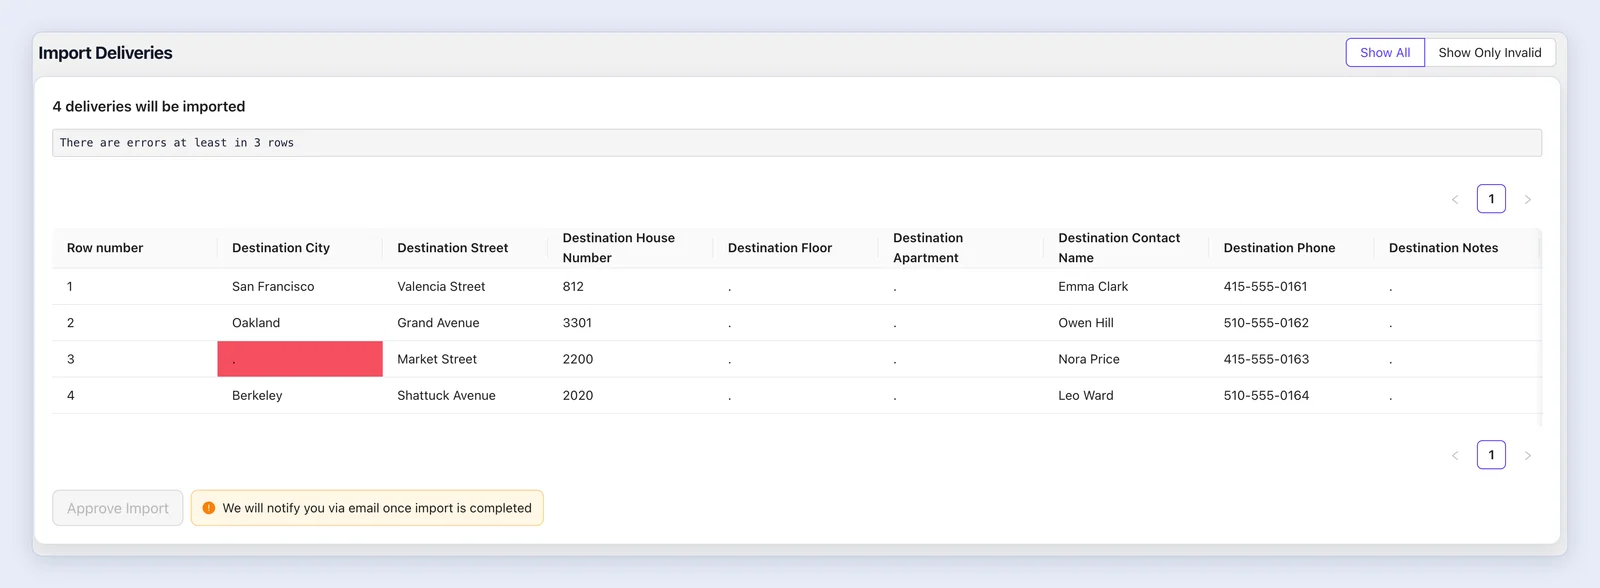
After you choose the file and click Import, a preview screen opens. It shows the deliveries in a table, lists the errors in the file with their row numbers, and lets you fix a value by clicking it. Use Show All / Show Only Invalid to switch between all rows and the rows with errors, then click Approve Import.
Note: The destination city is mandatory; the file can’t be imported while a row is missing a city.
Deliveries with the same Order ID
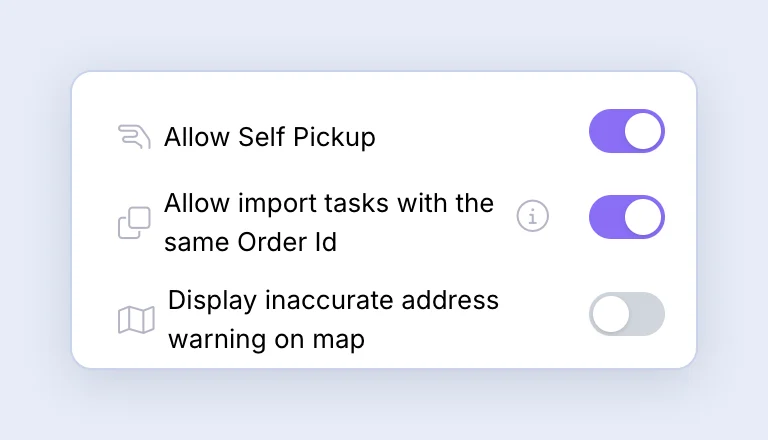
The Order ID can be left blank. By default, LionWheel doesn’t import a delivery whose Order ID already exists. To allow it, turn on Allow import tasks with the same Order Id under Settings => General => Advanced.
Import history
Click Import History to see every import, flexible or with the template: who imported the file, when, how many deliveries were created and how many were skipped because their Order ID already existed. From there you can open the original file, change the date and driver of the deliveries, print their labels or move them to the recycle bin. On the Recent Imports card, the Source column shows Flexible or Regular.
Note: If an error appears during an import, don’t upload the file again right away. The deliveries may already have been created in the background, and uploading again creates duplicates. Check Import History first.
Business customers
If your business customers import deliveries in their portal, they can use both ways too. In both, they choose one origin from their saved locations, the place the deliveries leave from (Source location in the flexible import, Pickup in the import with the template). It applies to every delivery in the file; the file can’t set a different origin for each delivery.