Automated SMS Notifications
This guide will walk you through the process of creating automated SMS messages to enhance your customer delivery experience
Updated
Dynamic Variables
The list of dynamic variables, with an explanation of each one, is shown on the Messages => Settings page, next to the message settings.
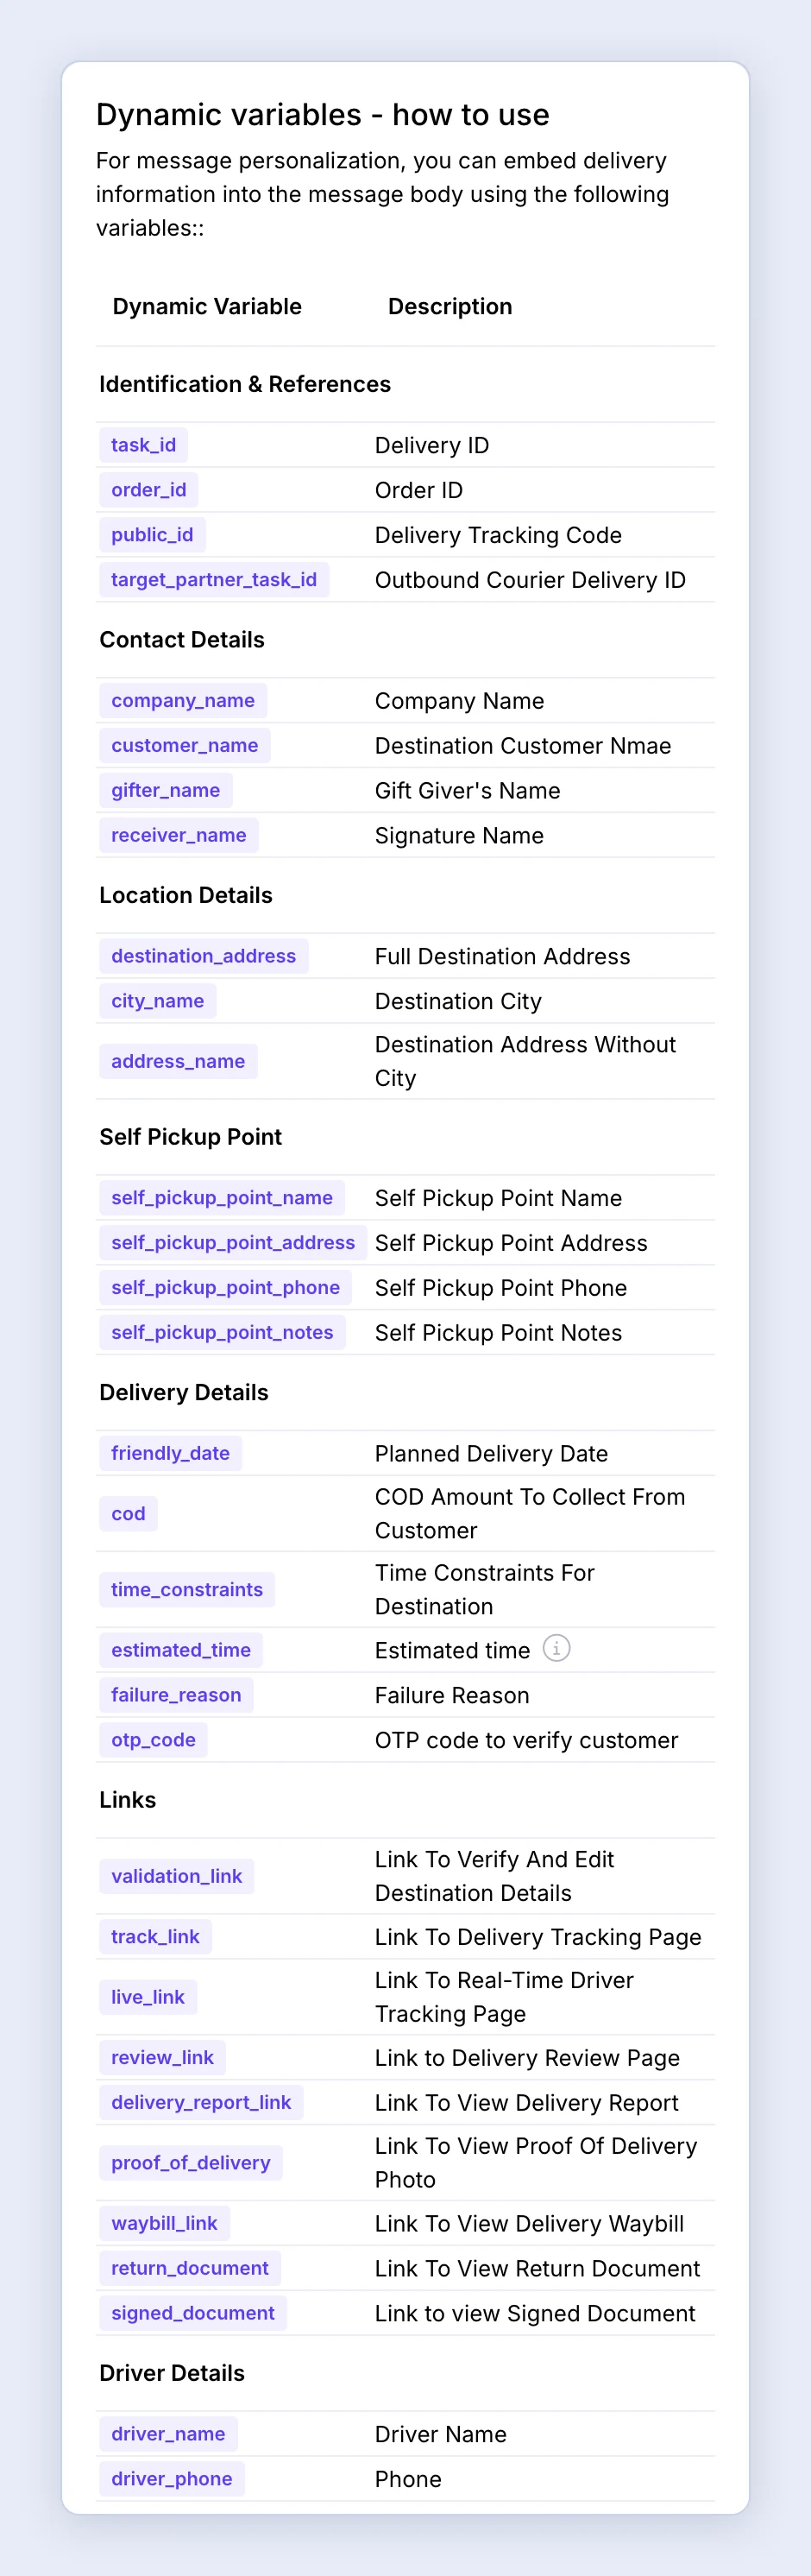
Use dynamic variables to enhance your messages with specific information such as the delivery customer’s name, address, driver’s phone number, links, and more.
To use these variables, copy and paste the variables exactly as they appear in the list into your desired message body.
For example: “Hi customer_name, delivery number task_id is on its way to you.”, the system will generate the message “Hi John Smith, delivery number 1234 is on its way to you.”
Settings
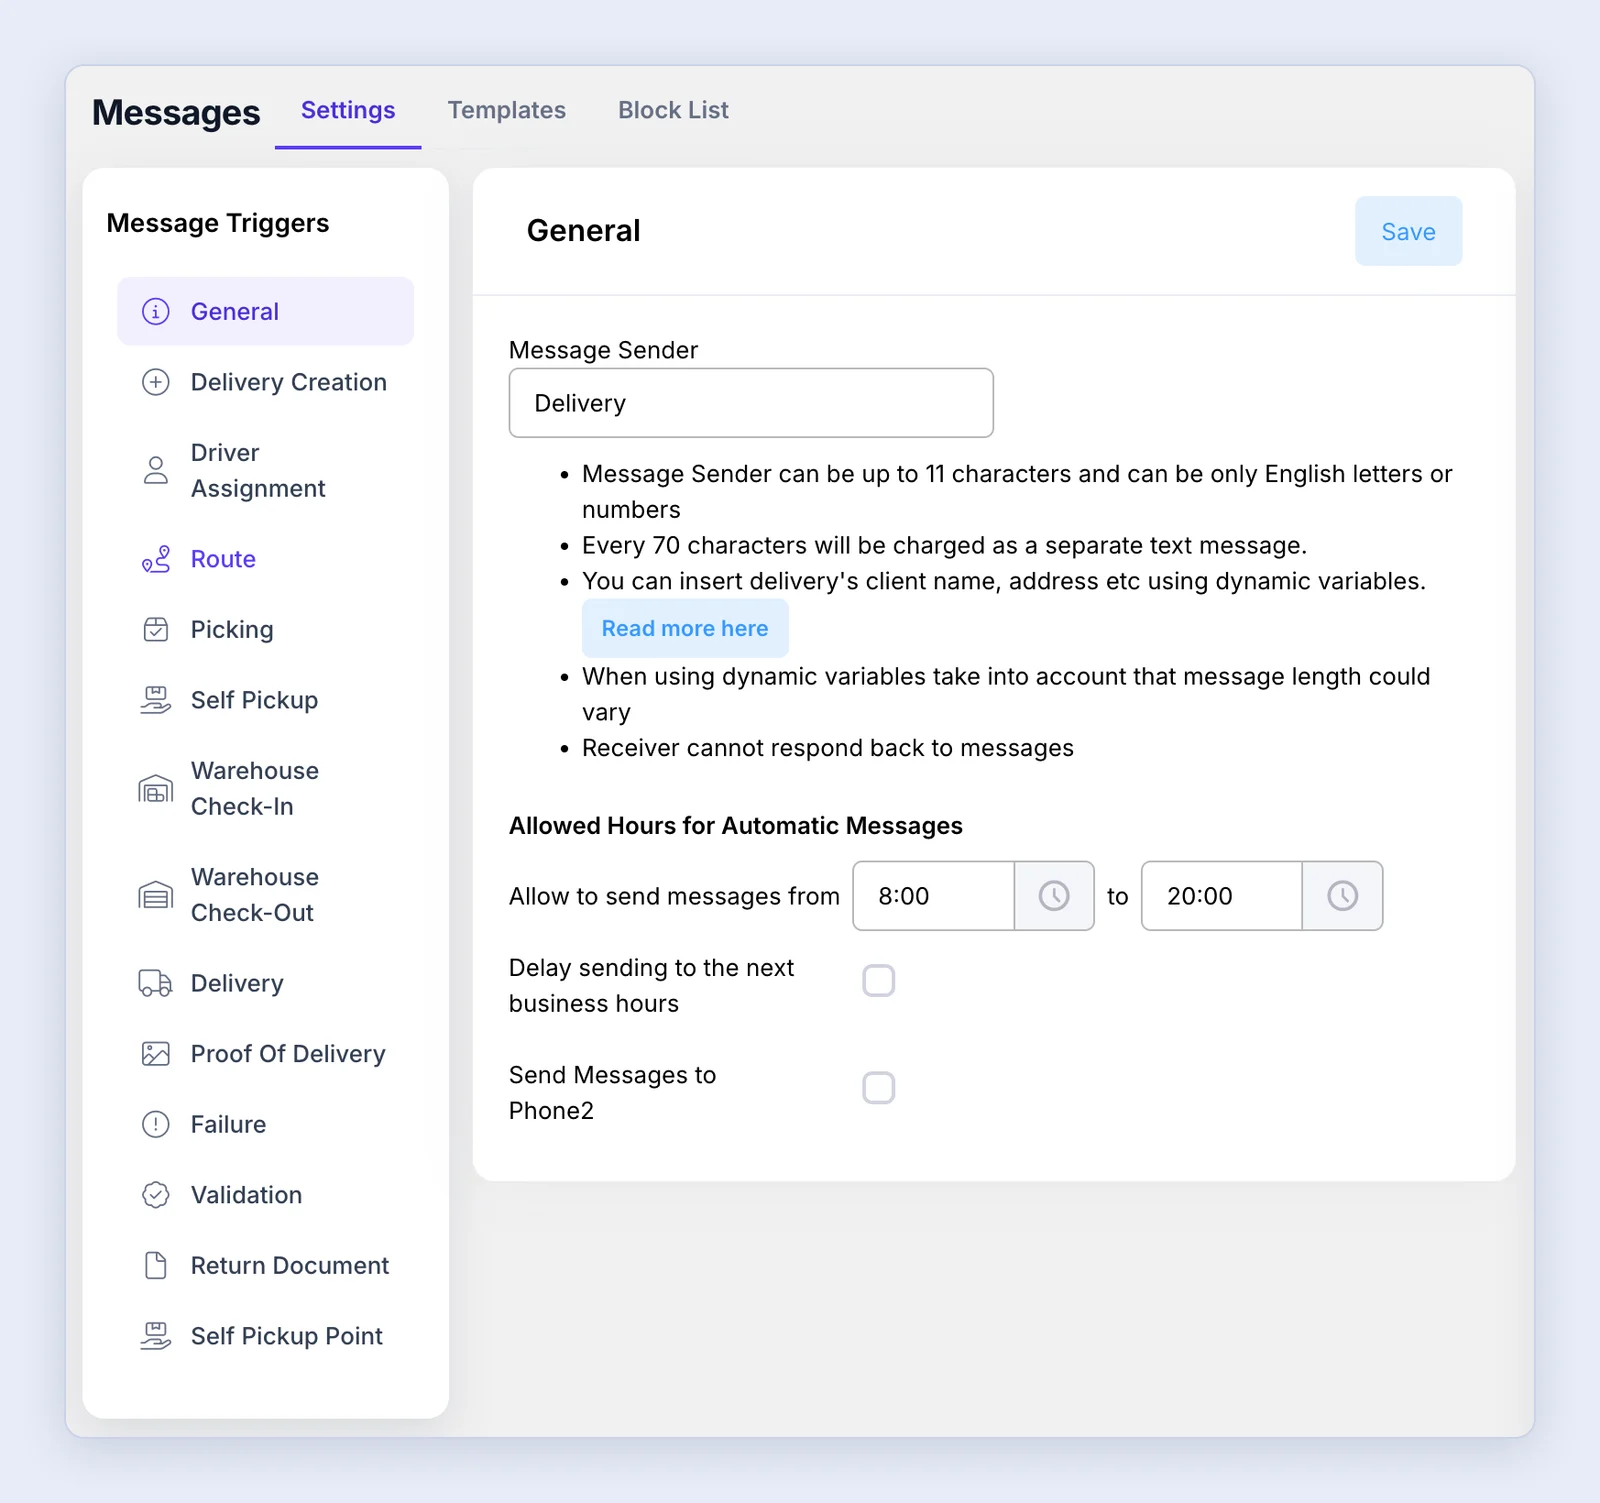
On the Messages page, under the Settings tab, you can manage the automatic messages that are sent based on various triggers (listed under “Message Triggers” on the left).
- “Message Sender” - The sender name can be up to 11 characters long and can contain only English letters or numbers (to change it, contact us at support@lionwheel.com).
- Under “Allowed Hours for Automatic Messages” you can set a time window for sending messages to avoid disturbing customers during nighttime, etc.
Route Notifications
Sending automatic messages to points on a route is done from the route planning page (view guide). To send SMS messages for a route, first compose the message template and activate it (Messages => Settings => Route: “General Route Message”, “ETA Window” and “Next in Route”).
The template is fixed and will be used for the entire route, but can be changed at any time.
Sending a general message to all points on the route
You can compose a general message and send it to all stops on the route through the route planning page.
For example: if deliveries are delayed.
Sending ETA windows to all points on the route
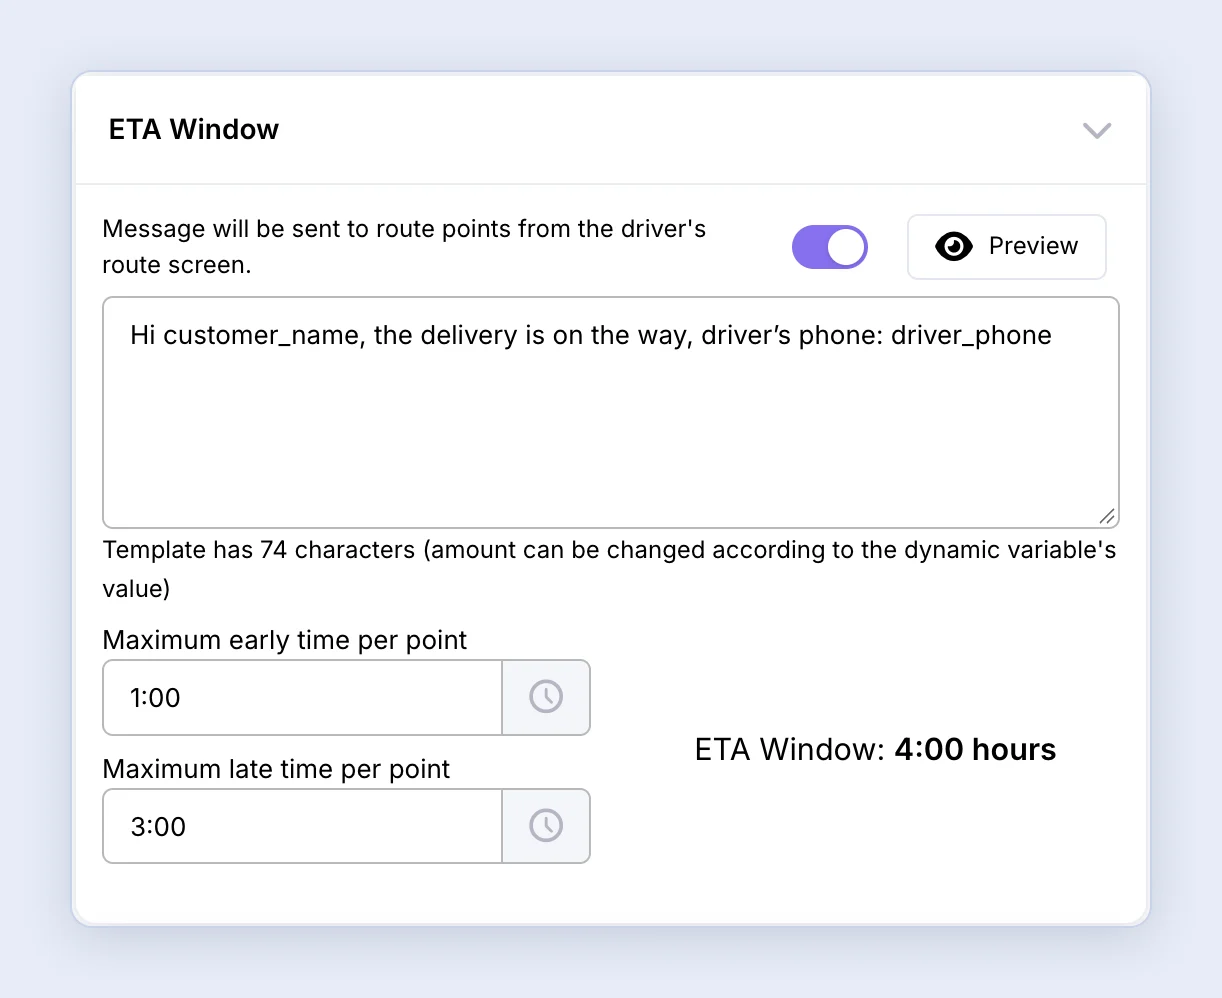
To calculate the arrival time window, define the time range for the window and ensure that the desired route has been successfully planned (when all stops have values in the “ETA” field).
For example: If the system calculated that the ETA for a point is 12:00, and we want the customer to receive a message that the delivery will arrive between 11:00 and 14:00, we’ll set “Maximum early time per point” to 1:00 (hour) and “Maximum late time per point” to 2:00 (two hours).
The time window will be automatically added to the message body.
“Driver on the way” message to the next stop
This is the most popular message: each customer gets a message as soon as the driver completes the stop before them, without you sending anything by hand.
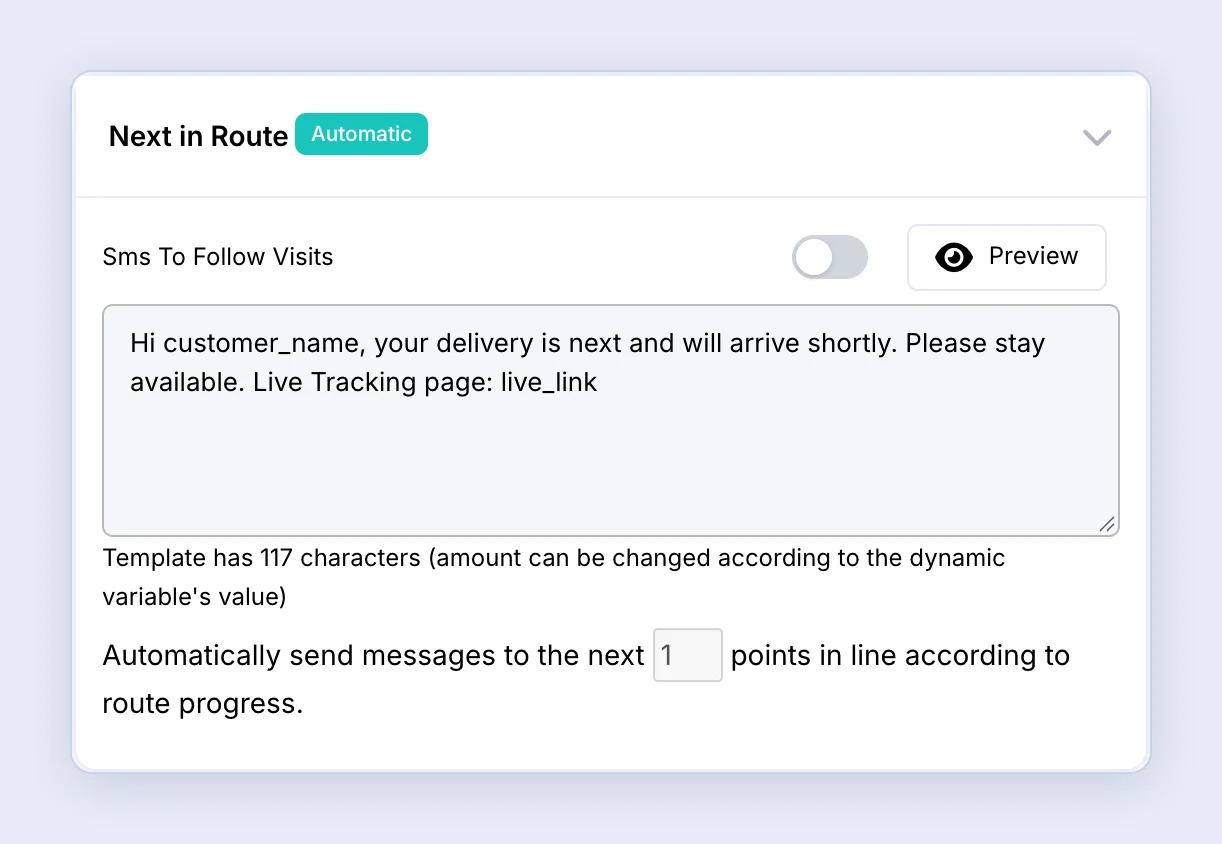
- Go to Messages => Settings => Route and open Next in Route.
- Turn the message on and write the template (you can use dynamic variables such as customer_name and driver_phone).
- In the line “Automatically send messages to the next X points in line according to route progress”, choose how many stops ahead to send, and click Save.
For example: If we choose 1, as soon as the driver marks the first stop as done, the second stop on the route gets a message that the driver is on the way. If we choose 2, when the first stop is done, the third stop gets the message, and so on.
The first stops on the route: no stop is completed before them, so they don’t get the message on their own. Once the route is planned, open the route planning page and click Messages => Text to the beginning of the route. The message goes to the first stops on the route (according to the number you chose), and from there the messages keep going out by themselves (route planning guide).
-
The message is sent only when the driver marks a stop as done, not when it’s marked as failed.
-
Outside the “Allowed Hours for Automatic Messages”, the message isn’t sent.
-
The message works with an active SMS or WhatsApp package (WhatsApp guide).
-
To turn the message off for a specific driver, clear Allow to send SMS in route based on progress in the driver’s profile.
-
There are many other types of SMS messages with built-in explanations in the system. Note that some messages need to be activated at the company level under their company profile.
Templates
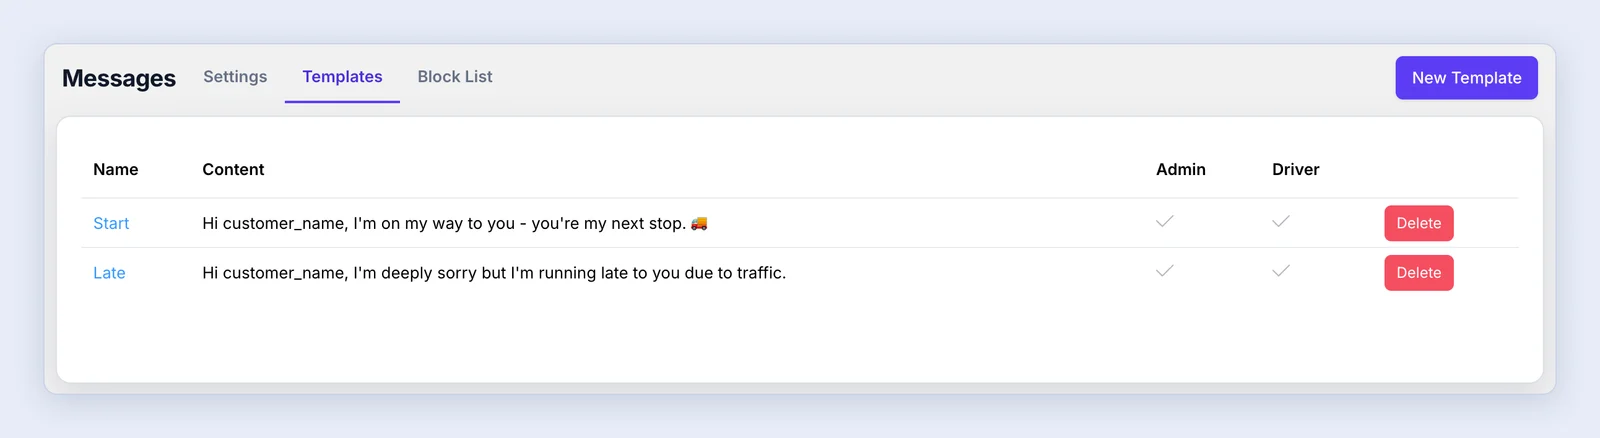
Under the Templates tab, you can define new SMS templates and set their permissions (Admin/Driver). The driver will have the option in the App to send a message to the customer from the template repository, without the ability to compose the message content.
Block List
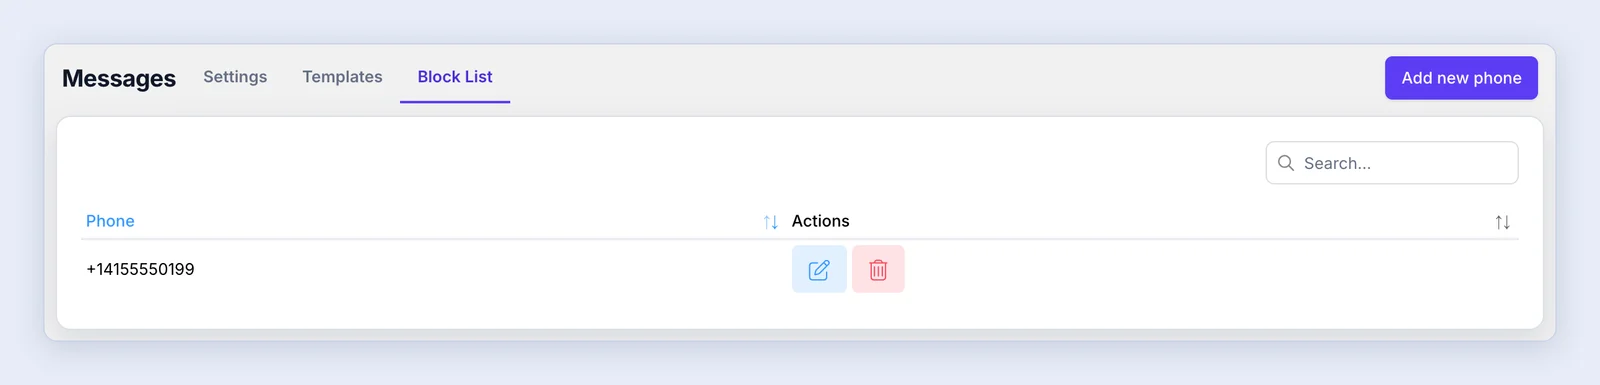
You can save phone numbers in the blocklist to ensure that SMS messages from the system will never be sent to customers on this list.