
Delivery Date & Time Picker for Shopify
The Date & Time Picker widget is an essential tool that gives your customers control over when they receive their orders while ensuring your operations remain efficient.
By enabling this feature, you allow customers to select a specific date and time slot for Local Delivery or Self Pickup directly from the cart page.
Use the DatePicker Widget button to open the configuration page.
From this page, you can manage all date and time selection options in one place.
Configuring Delivery & Pickup Options
Local Delivery
To activate Local Delivery for your own fleet of drivers, simply toggle the switch to "On" and define your specific delivery zones and time slots.
Zone Settings:
Zone Name: Give your delivery zone a name (e.g., "Downtown", "North Region").
Cities / Zip Codes: Define exactly where you deliver. You can list specific cities or zip codes to restrict availability.
Delivery Areas: Click the link to open the map view for more precise area drawing.
Time Slots:
Select the days of the week you deliver (e.g., enable "Sunday").
Click Add time slot to define hours (e.g., 09:00 - 12:00).
You can create multiple slots per day.
Self Pickup
To activate Self Pickup, toggle the switch to "On" and enter your location details to allow customers to collect orders directly from your store or warehouse.
Location Details:
Fill in your Store Address fields (Name, State, City, Street, House Number, Zip Code).
Note: This address will be shown to the customer so they know where to go.
Pickup Hours:
Just like delivery, select the days you are open for pickup.
Add specific Time Slots to control traffic flow at your store.
Shipping
To activate Shipping, toggle the switch to "On" to allow standard courier deliveries (like FedEx or UPS) that don't require specific time slots and are shipped at the earliest opportunity.
Adding the Date & Time Picker Widget to Your Cart Page
The next step is to display the Date & Time Picker widget on your Cart page.
This allows customers to choose their preferred delivery or self pickup date and time before proceeding to checkout.
Step 1: Open the Theme Editor
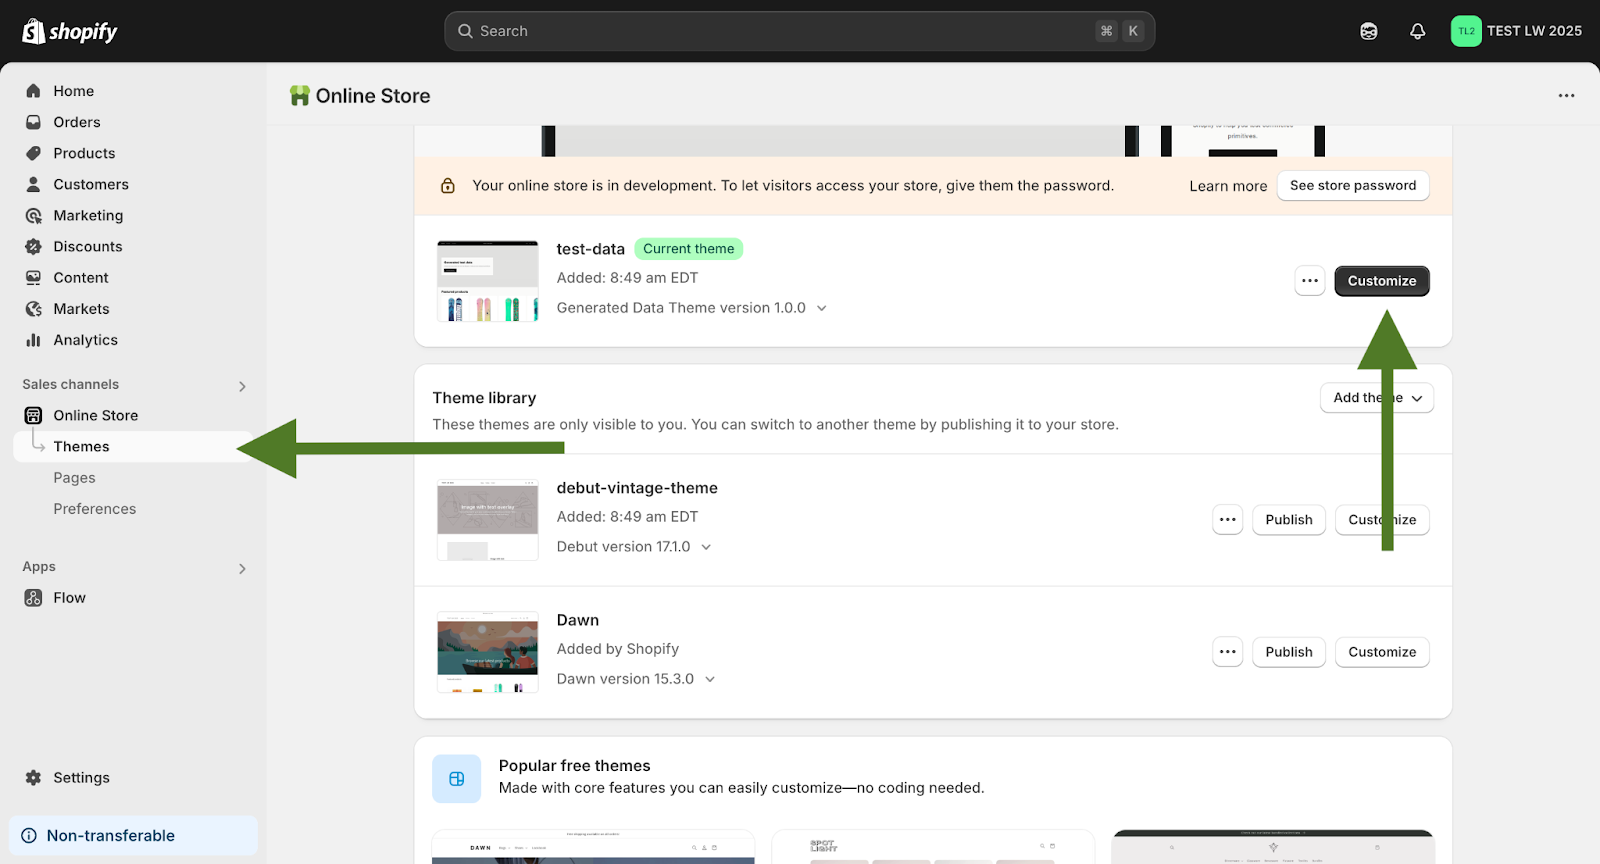
Go to your Shopify Admin
Navigate to Online Store > Themes
In the current theme section, click Customize
This will open the Shopify Theme Editor.
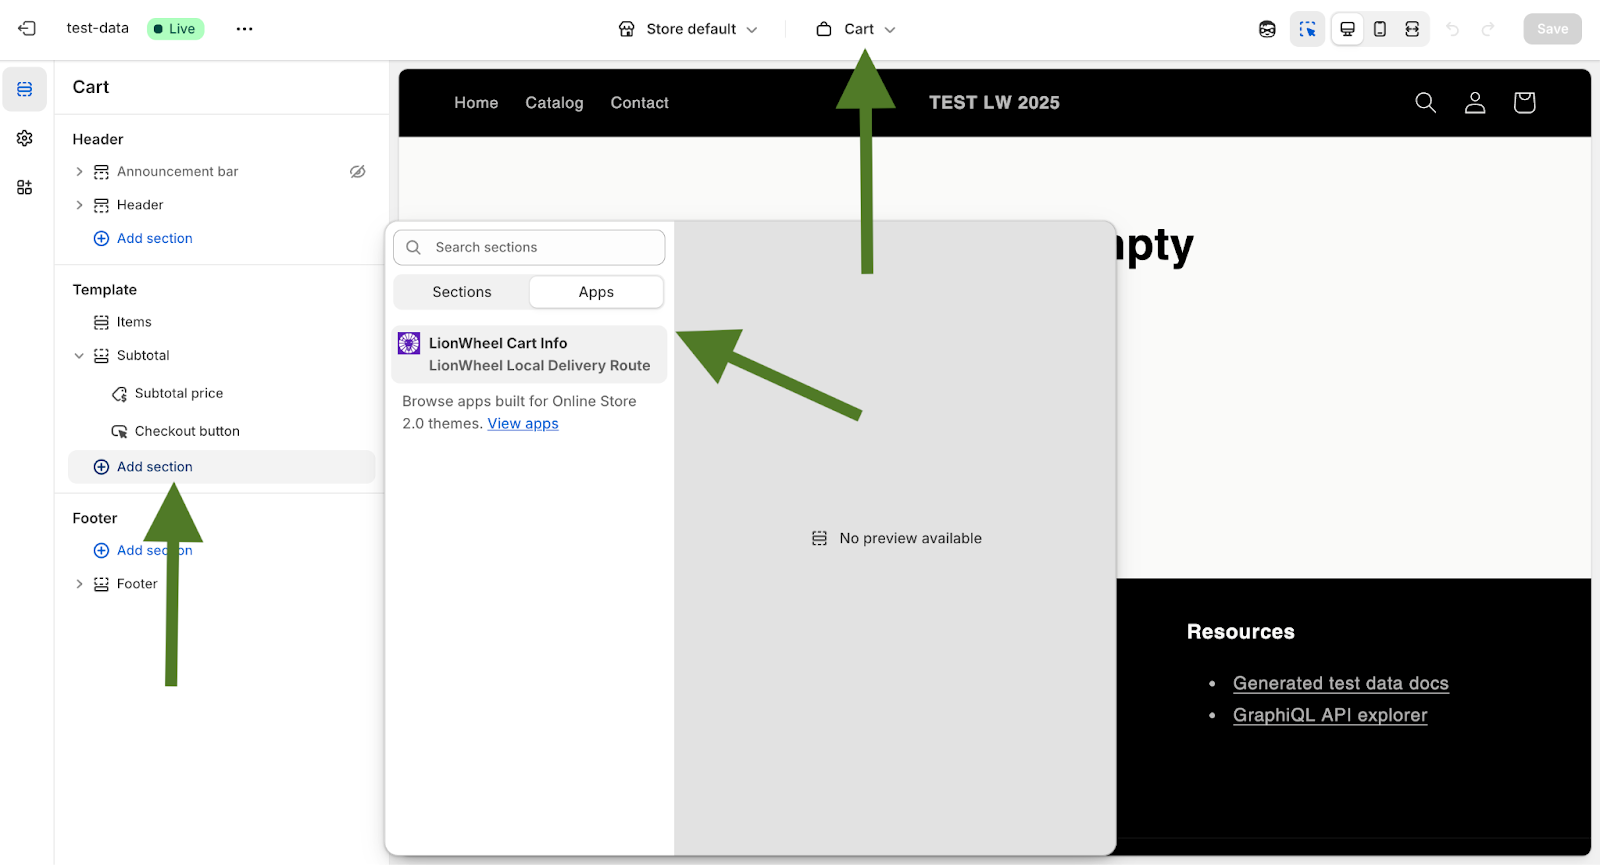
Step 2: Switch to the Cart Page
In the top bar of the Theme Editor, click the page selector select Cart
The preview will now show your Cart page layout.
In the left sidebar, scroll to the Template section
Click Add section
Switch to the Apps tab
Search for LionWheel
Select LionWheel Cart Info
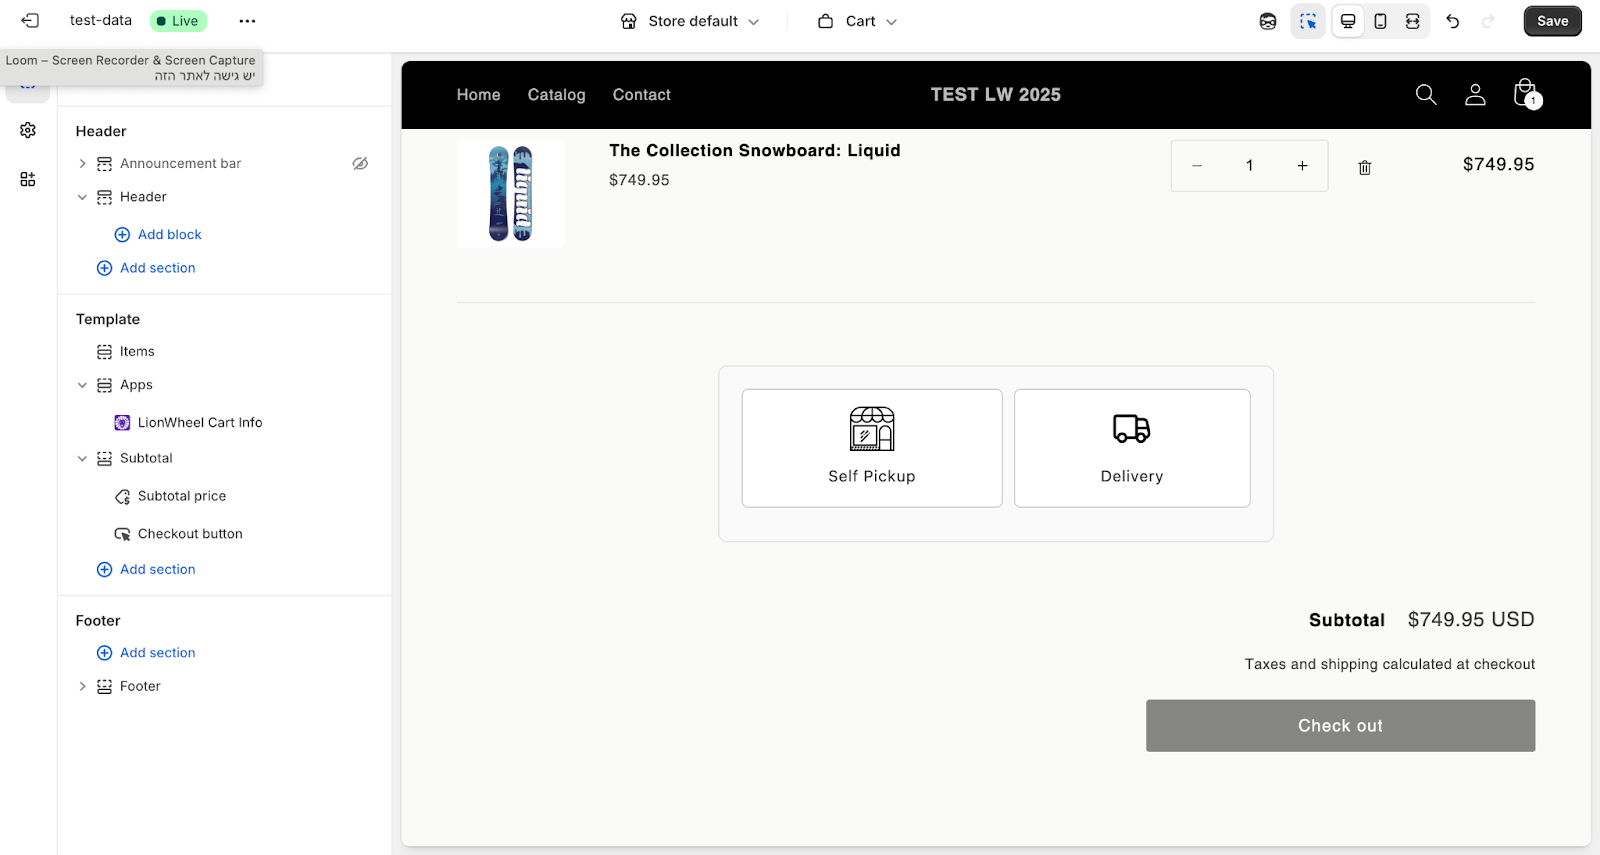
The widget will be added to the Cart page preview. You can place it above or below the subtotal, depending on your preference. Click Save in the top right corner of the Theme Editor - the widget is now live on your Cart page.
Do you have any additional questions?
Feel free to contact us at support@lionwheel.com